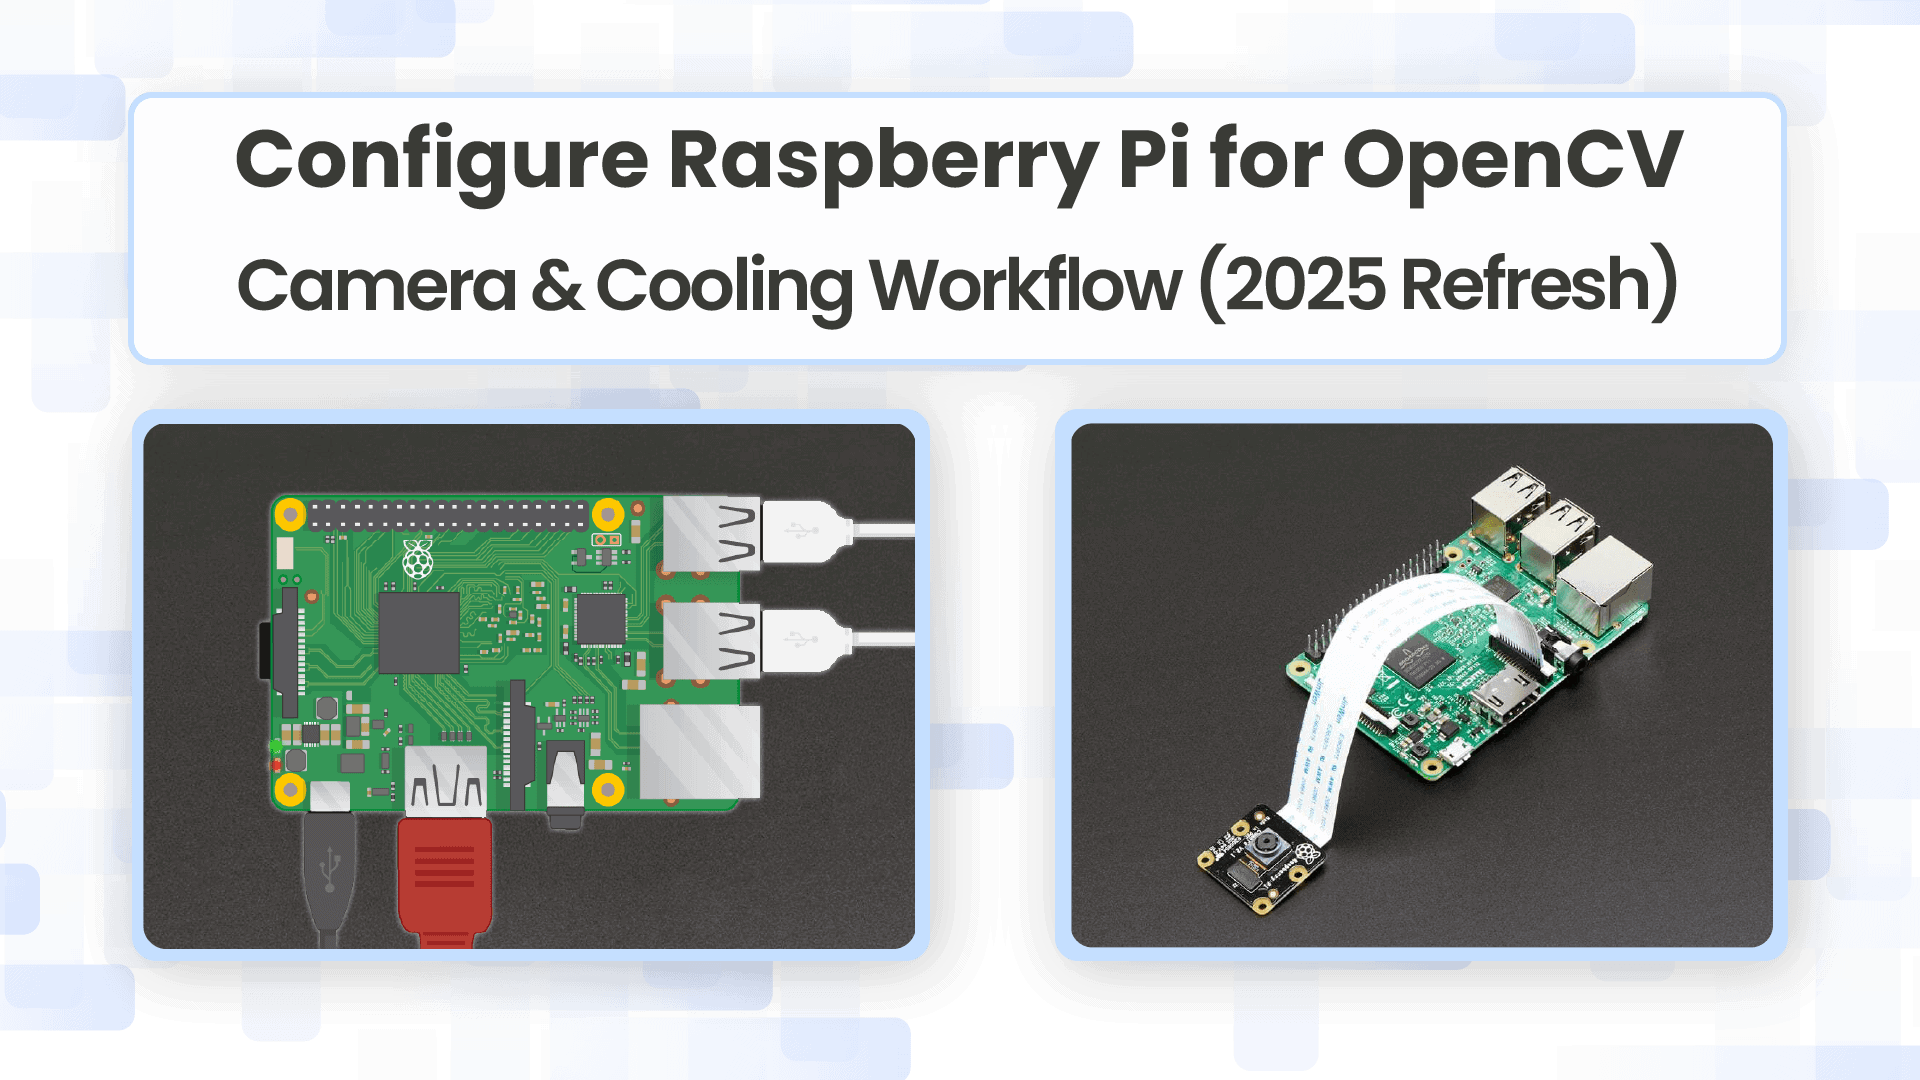
Computer vision has evolved into one of the most approachable fields for anyone interested in practical AI, whether you’re a student, engineer, hobbyist, or maker. With the performance of the Raspberry Pi and the maturity of OpenCV, building reliable vision applications at home has become remarkably straightforward.
This guide provides a complete walkthrough for getting OpenCV running on the Raspberry Pi in 2025. It covers hardware preparation, Ubuntu installation, and OpenCV setup, followed by hands-on examples in object tracking, and deep learning based classification.
Table of contents
1. Hardware Configuration
To get started with your Raspberry Pi, you’ll need the following:
- Raspberry Pi (4GB or 8GB recommended)
- USB-C 5V/5A Power Supply
- Boot media (e.g., a microSD card with ample storage and speed)
- Active Cooling (Fan or Case with Cooling)
- Raspberry Pi NoIR Camera V2
- Keyboard, Mouse, HDMI cable, and Display
1.1 Installation of Ubuntu 24.04 on Raspberry Pi
While Raspberry Pi OS is the default choice, Ubuntu Desktop 24.04 LTS (64-bit) is an excellent alternative that often provides a more familiar environment for developers, better hardware support, and easier integration with enterprise-level tools.
Step 1: Download Imager: Download the latest version of the official Raspberry Pi Imager tool for your computer.
Step 2: Select OS: Open the Imager, choose “Operating System” -> “Ubuntu” -> “Ubuntu Desktop 24.04 LTS (64-bit)”.
Step 3: Select Storage: Insert your microSD card or an NVMe drive and select it as the target storage.
Step 4: Write Image: Click “Write” to begin the process. Once complete, insert the storage media into your Raspberry Pi.
Step 5: First Boot: Connect your RPi to a monitor, keyboard, and mouse, and power it on. The Raspberry Pi will boot into Ubuntu. If you didn’t set a username/password during the imaging process, you will be prompted to create one on first boot.
1.2 Raspberry Pi Setup along with Active Cooling Fan
The Raspberry Pi runs significantly faster, and under heavy load (such as continuous video processing with OpenCV), it can generate substantial heat. Active cooling is not optional; it’s essential for maintaining peak performance and avoiding thermal throttling.
- Necessity: OpenCV’s DNN and heavy image manipulation algorithms push the CPU/GPU to their limits. Without proper cooling, the system will reduce the clock speed, slowing down your computer vision application.
- The Official Active Cooler: Raspberry Pi offers an Active Cooler that clips directly onto the board. It combines an aluminum heatsink with a temperature-controlled blower fan that connects to the dedicated 4-pin fan header.
- Installation:
- Ensure the Raspberry Pi is powered off.
- Remove the backing paper from the pre-applied thermal pads on the cooler.
- Carefully align the cooler over the Raspberry Pi.
- Gently push the spring-loaded mounting pins down until they click into place.
- Connect the fan’s cable to the four-pin fan connector on the Raspberry Pi.
- Apply power to the Raspberry Pi, and the cooler will begin operating automatically when needed.
Pro Tip: Once booted, you can easily monitor your CPU temperature in real-time by installing and running a system monitor like bpytop, using sudo apt install bpytop then, bpytop which will display your current thermal state.
1.3 Setting up Raspberry Pi NoIR Camera V2
The Raspberry Pi NoIR Camera v2 is an 8MP camera based on the Sony IMX219 sensor, designed for infrared and low-light computer vision. Unlike regular camera modules, it does not have an IR-cut filter, allowing it to capture infrared light when used with IR LEDs.
In this setup, we use the legacy camera stack enabled through raspi-config and access the camera using the V4L2 interface, which works directly with OpenCV.
1. Physical Setup of the NoIR Camera v2
- Power off the Raspberry Pi completely.
- Insert the NoIR camera ribbon cable into the CSI camera port.
- Ensure:
- The metal contacts face the correct direction (towards the HDMI ports).
- The ribbon is fully inserted and locked.
- Secure the camera module and power ON the Pi.
2. Enable Legacy Camera Using raspi-config
Since this setup uses V4L2 instead of libcamera, we must enable the legacy camera interface.
sudo raspi-config
Navigate to Interface Options → Legacy Camera → Enable, select Yes, exit raspi-config, and reboot the system using sudo reboot.
This switches the system back to the camera stack that exposes the camera as a standard V4L2 device.
3. Install Required V4L2 and OpenCV Dependencies
sudo apt update
sudo apt install -y v4l-utils ffmpeg python3-opencv
This installs:
- v4l2-ctl → camera device control
- ffmpeg → video recording & conversion
- python3-opencv → OpenCV Python bindings
4. Verify That the Camera Is Detected (V4L2)
Check available video devices:
v4l2-ctl --list-devices
This confirms that the NoIR camera is available as /dev/video0.
You can also inspect supported formats:
v4l2-ctl --device=/dev/video0 --list-formats
5. Command-Line Camera Test
Capture a Still Image
ffmpeg -f v4l2 -i /dev/video0 -frames:v 1 test.jpg
Record a Short Video
ffmpeg -f v4l2 -i /dev/video0 -t 5 test.mp4
This records a 5-second video using the NoIR camera through the V4L2 interface.
Sample Test: Recording a short video and reading the frames
This sample test demonstrates basic live camera validation using OpenCV and V4L2. It records a 3-second video stream from the Raspberry Pi NoIR camera, saves it as an MP4 file, and then reopens the video to read and display each frame. This confirms that live capture, video encoding, and frame extraction are all working correctly.
import cv2
from IPython.display import display, clear_output
from PIL import Image

# Parameters
video_filename = "test_video.mp4"
duration_secs = 3
fps = 30
width, height = 640, 480

# Open the camera
cap = cv2.VideoCapture("/dev/video0")
cap.set(cv2.CAP_PROP_FRAME_WIDTH, width)
cap.set(cv2.CAP_PROP_FRAME_HEIGHT, height)
cap.set(cv2.CAP_PROP_FPS, fps)

if not cap.isOpened():
    print("Error: Could not open camera.")
else:
    # Define VideoWriter to save video
    fourcc = cv2.VideoWriter_fourcc(*'mp4v')
    out = cv2.VideoWriter(video_filename, fourcc, fps, (width, height))

    # Calculate total frames
    total_frames = duration_secs * fps
    frame_count = 0

    print("Recording 3-second video...")
    while frame_count < total_frames:
        ret, frame = cap.read()
        if not ret:
            print("Failed to grab frame")
            break

        # Write frame to video
        out.write(frame)

        # Optional: display frame in notebook
        frame_rgb = cv2.cvtColor(frame, cv2.COLOR_BGR2RGB)
        img = Image.fromarray(frame_rgb)
        clear_output(wait=True)
        display(img)

        frame_count += 1

    cap.release()
    out.release()
    print(f"Video saved as {video_filename}")

# Reading frames from the recorded video
cap = cv2.VideoCapture(video_filename)
frame_number = 0

while True:
    ret, frame = cap.read()
    if not ret:
        break

    # Convert to RGB for notebook display
    frame_rgb = cv2.cvtColor(frame, cv2.COLOR_BGR2RGB)
    img = Image.fromarray(frame_rgb)
    clear_output(wait=True)
    display(img)

    frame_number += 1

cap.release()
print(f"Extracted and displayed {frame_number} frames from {video_filename}")
2. Installation of OpenCV on Raspberry Pi
TTo begin developing computer vision applications on the Raspberry Pi, you must first install OpenCV, a powerful open-source library used for image processing, video analysis, and deep-learning–based vision tasks.
For Python development, there are two main installation methods:
- Pip in a virtual environment (fast and simple)
- Build from source (more flexible and performance-optimized)
The pip method is ideal for beginners and quick prototyping, while building from source is recommended for users who need maximum performance, extra modules, or C++ support.
2.1. Pip install in a Virtual Environment
The pip method is the fastest and easiest way to install OpenCV for Python. By installing OpenCV inside a virtual environment, you keep your project dependencies isolated from the system Python packages, which helps avoid version conflicts and makes your setup more reproducible.
This method is best suited if:
- You are working only with Python
- You want a quick setup
- You do not require custom OpenCV builds or C++ support
It installs OpenCV only for Python, not for C++ development.
1. Update the Raspberry Pi
sudo apt update && sudo apt upgrade -y
python3 --version
2. Install pip and Virtual Environment Tools
sudo apt install -y python3-pip python3-venv
3. Create a Virtual Environment
Create a project folder:
cd ~/Desktop

mkdir projects

cd projects
Create the virtual environment:
python3 -m venv opencv_venv
Activate it:
source opencv_venv/bin/activate
Your prompt will change, showing that you’re inside the environment.
4. Install OpenCV


Inside the virtual environment, install OpenCV:
pip3 install opencv-contrib-python
This installs both the main OpenCV modules and the contrib modules (tracking, ArUco, xfeatures2d, etc.)
1.2. Building OpenCV from source On Raspberry Pi
Building OpenCV from source on the Raspberry Pi is the most powerful and flexible installation method. Although it requires more time and system resources than the pip approach, it gives you full control over the build configuration, enabled modules, hardware optimizations, and C++ support.
This method is recommended if:
- You need maximum performance on the Pi
- You want access to OpenCV Contrib modules
- You plan to use OpenCV with C++
- You require a custom-built OpenCV version for research or production use
Step 1: Update the System
sudo apt update && sudo apt upgrade -y
sudo reboot
Step 2: Install Build Tools and Dependencies
These packages provide the compiler and build tools, enable image/video processing support, add GUI rendering, ensure optimized numerical performance, and include the required Python development and NumPy support for OpenCV.
sudo apt install -y build-essential cmake git pkg-config \

    libjpeg-dev libpng-dev libtiff-dev \

    libavcodec-dev libavformat-dev libswscale-dev \

    libv4l-dev libxvidcore-dev libx264-dev \

    libgtk-3-dev libatlas-base-dev gfortran \

    python3-dev python3-numpy
Step 3: Download OpenCV and OpenCV Contrib Sources
mkdir ~/opencv_build

cd ~/opencv_build

git clone <https://github.com/opencv/opencv.git>

git clone <https://github.com/opencv/opencv_contrib.git>
Check out a specific stable version:
cd opencv

git checkout 4.x

cd ../opencv_contrib

git checkout 4.x
Step 4: Create Build Directory and Configure with CMake
This is the most important step. Here we specify what to enable, disable, optimize, and where to install the final binaries.
cd ~/opencv_build/opencv

mkdir build

cd build
Run the CMake configuration:
cmake -D CMAKE_BUILD_TYPE=RELEASE \\

-D CMAKE_INSTALL_PREFIX=/usr/local \\

-D OPENCV_EXTRA_MODULES_PATH=~/opencv_contrib/modules \\

-D ENABLE_NEON=ON \\

-D WITH_OPENMP=ON \\

-D WITH_OPENCL=OFF \\

-D BUILD_TIFF=ON \\

-D WITH_FFMPEG=ON \\

-D WITH_TBB=ON \\

-D BUILD_TBB=ON \\

-D WITH_GSTREAMER=ON \\

-D BUILD_TESTS=OFF \\

-D WITH_EIGEN=OFF \\

-D WITH_V4L=ON \\

-D WITH_LIBV4L=ON \\

-D WITH_VTK=OFF \\

-D WITH_QT=OFF \\

-D WITH_PROTOBUF=ON \\

-D OPENCV_ENABLE_NONFREE=ON \\

-D INSTALL_C_EXAMPLES=OFF \\

-D INSTALL_PYTHON_EXAMPLES=OFF \\

-D OPENCV_FORCE_LIBATOMIC_COMPILER_CHECK=1 \\

-D PYTHON3_PACKAGES_PATH=/usr/lib/python3/dist-packages \\

-D OPENCV_GENERATE_PKGCONFIG=ON \\

-D BUILD_EXAMPLES=OFF ..
If the configuration succeeds, CMake will generate a summary report showing all enabled modules.
Step 5: Build OpenCV (This takes some time)
Use all 4 cores for safe memory usage:
make -j4
If successful, you’ll see a message similar to “Build complete”.
Note: If the Build Fails or Freezes (Important)
On some systems, especially when using a microSD card or lower RAM variants, the build may fail, freeze, or crash due to memory exhaustion. If that happens, simply retry the build using fewer CPU cores:
make -j3
or, for very stable low-memory builds:
make -j2
Using fewer cores reduces RAM usage and greatly improves build stability, at the cost of slightly longer compile time. This is a common and completely normal adjustment on Raspberry Pi systems.
Step 6: Install OpenCV
sudo make install
sudo ldconfig
Step 7: Verify Installation
Run in Python:
python3 -c "import cv2; print(cv2.__version__)"
You should see your installed OpenCV version (e.g., 4.12.x).
3. Run Some OpenCV Examples On Raspberry Pi
Once OpenCV is installed, it is essential to validate the setup using a few basic examples. These tests confirm that OpenCV can handle images and videos, access the camera, and perform core computer vision operations, forming the foundation for more advanced applications.
3.1 OpenCV on Raspberry Pi Example – Object Tracking
Object tracking involves localizing an object in consecutive video frames. OpenCV provides several high-performance trackers, such as CSRT (for accuracy) and KCF (for speed), which are perfect for the RPi.
import cv2
import matplotlib.pyplot as plt
from IPython.display import display, clear_output

# Input video path and output video path
video_path = "video.mp4"
output_path = "output.mp4"

# Open video file for reading
cap = cv2.VideoCapture(video_path)

# Read the first frame (needed to initialize trackers)
ok, frame = cap.read()
if not ok:
    print("Error reading video")

# Display the first frame so the user can visually check coordinates for cropping/ROI
plt.figure(figsize=(10,6))
plt.imshow(cv2.cvtColor(frame, cv2.COLOR_BGR2RGB))   # Convert BGR → RGB for matplotlib
plt.title("First Frame - Note the coordinates to crop objects")
plt.axis("off")
plt.show()

# Choose your tracker type
tracker_type = "CSRT"   # Options: "CSRT" or "KCF"

# Frames to skip for faster processing.
frame_skip = 4

# Bounding boxes of the objects to track: (x, y, width, height)
# These are manually chosen from the first-frame inspection.

bboxes = [(800, 380, 250, 350)]

# Create a MultiTracker object that can track multiple ROIs at the same time
multi_tracker = cv2.legacy.MultiTracker_create()

# Add one tracker per bounding box
for box in bboxes:

    # Create the chosen tracker for each object
    if tracker_type == "CSRT":
        tracker = cv2.legacy.TrackerCSRT_create()   # More accurate, slightly slower
    elif tracker_type == "KCF":
        tracker = cv2.legacy.TrackerKCF_create()    # Faster, less accurate
    else:
        raise ValueError("Tracker must be 'CSRT' or 'KCF'")

    # Add tracker and initialize it with the first frame + ROI
    multi_tracker.add(tracker, frame, tuple(box))

# Set up output video writer
fps = cap.get(cv2.CAP_PROP_FPS)        # Read original FPS
h, w, _ = frame.shape                  # Frame size
fourcc = cv2.VideoWriter_fourcc(*"mp4v")

# Adjust FPS based on skipping (to keep speed natural)

out = cv2.VideoWriter(
    output_path,
    fourcc,
    fps // frame_skip if fps >= frame_skip else fps,
    (w, h)
)

print("Saving output to:", output_path)
frame_index = 0

# Main tracking loop
while True:
    ok, frame = cap.read()
    if not ok:
        print("Video ended")
        break

    # Skip frames based on frame_skip to speed up processing
    if frame_index % frame_skip != 0:
        frame_index += 1
        continue

    # Update all trackers and get new bounding box positions
    ok, boxes = multi_tracker.update(frame)

    # Draw each tracked object on the frame
    for box in boxes:
        x, y, w_box, h_box = [int(v) for v in box]
        cv2.rectangle(frame,  (x, y),  (x + w_box, y + h_box),  (0, 255, 0),  2)

    # Save processed frame to output video
    out.write(frame)

    # Display results
    clear_output(wait=True)
    plt.figure(figsize=(10,6))
    plt.imshow(cv2.cvtColor(frame, cv2.COLOR_BGR2RGB))
    plt.axis("off")
    plt.title(f"Tracking with {tracker_type}")
    plt.show()
    frame_index += 1

# Release video objects
cap.release()
out.release()
print("Tracking video saved successfully")
Output:
3.2 OpenCV DNN example: Image classification
This code performs image classification using OpenCV’s DNN module and a pre-trained MobileNetV2 ONNX model. It is optimized for running on a Raspberry Pi, but also supports CPU/GPU selection depending on availability.
1. Importing Required Libraries
import cv2
import numpy as np
import matplotlib.pyplot as plt
import time
import psutil
import json
import torch
#Print version of OpenCV
print("OpenCV:", cv2.**version**)
OpenCV: 4.12.0
2. Downloading and Loading the ONNX Model
Downloads a pre-trained MobileNetV2 model in ONNX format. MobileNetV2 is lightweight and ideal for embedded systems like Raspberry Pi.
!wget -O mobilenetv2.onnx <https://github.com/onnx/models/raw/main/validated/vision/classification/mobilenet/model/mobilenetv2-7.onnx>
Load the model
OpenCV loads the ONNX model into its DNN engine.
# Load ONNX model
net = cv2.dnn.readNetFromONNX("mobilenetv2.onnx"
print(" Model loaded successfully!")
Model loaded successfully!
3. Selecting CPU/GPU Inference Backend
USE_GPU = False  # Set to False to force CPU
DEVICE = "cuda" if (USE_GPU and torch.cuda.is_available()) else "cpu"
if DEVICE == "cuda":
net.setPreferableBackend(cv2.dnn.DNN_BACKEND_CUDA)
net.setPreferableTarget(cv2.dnn.DNN_TARGET_CUDA)
print(" Running on GPU (CUDA)")
else:
net.setPreferableBackend(cv2.dnn.DNN_BACKEND_OPENCV)
net.setPreferableTarget(cv2.dnn.DNN_TARGET_CPU)
print(" Running on CPU")
4. Downloading ImageNet Labels
This file contains human-readable ImageNet class names.
# Download the label file (contains ImageNet class names)
!wget -O classification_classes_ILSVRC2012.txt <https://raw.githubusercontent.com/anishathalye/imagenet-simple-labels/master/imagenet-simple-labels.json>

# Load the labels from the JSON file
with open("classification_classes_ILSVRC2012.txt") as f:
    labels = json.load(f)
5. Image Classification Function
The input_images() function loads an image, preprocesses it for MobileNetV2, performs classification using the ONNX model, displays the image with the predicted label, and prints the confidence, inference time, and memory usage.
# Function to process a single image

def input_images(image_path):
    # Load the input image
    img = cv2.imread(image_path)
    if img is None:
        print(f" Could not read {image_path}")
        return

    # Convert BGR (OpenCV default) to RGB (for proper display)
    img_rgb = cv2.cvtColor(img, cv2.COLOR_BGR2RGB)

    # Resize image to the required input size of MobileNetV2 (224x224)
    resized = cv2.resize(img_rgb, (224, 224))

    #Preprocess image into blob
    blob = cv2.dnn.blobFromImage(
        image=resized,
        scalefactor=1/127.5,           # Normalize pixels to [-1, 1]
        size=(224, 224),               # Input size for MobileNetV2
        mean=(127.5, 127.5, 127.5),    # Mean subtraction for normalization
        swapRB=True,                   # Convert OpenCV BGR → RGB
        crop=False                     # Do not crop the image
    )

    # Set the blob as input to the network
    net.setInput(blob)

    # Perform forward pass (inference)
    start = time.time()
    out = net.forward()  # Run model
    inference_time = (time.time() - start) * 1000  # ms

    # Post-process model output
    out = out.flatten()  # Flatten from 2D to 1D (1000 classes)

    # Apply softmax to get probabilities
    probabilities = np.exp(out - np.max(out))
    probabilities = probabilities / np.sum(probabilities)

    # Find class with highest probability
    class_id = np.argmax(probabilities)
    confidence = probabilities[class_id]
    label = labels[class_id]

    # Overlay prediction on image
    output_img = img_rgb.copy()
    text = f"{label} ({confidence*100:.2f}%)"
    cv2.putText(output_img, text, (10, 30), cv2.FONT_HERSHEY_SIMPLEX, 0.9, (255, 0, 0), 2, cv2.LINE_AA)

    # Display the image with prediction
    plt.figure(figsize=(6,6))
    plt.imshow(output_img)
    plt.axis("off")
    plt.title(f"{image_path}")
    plt.show()

    # Print results and system stats
    print(f"Predicted: {label} ({confidence*100:.2f}%)")
    print(f"Inference time: {inference_time:.2f} ms")

    # Memory usage
    process = psutil.Process()
    mem_mb = process.memory_info().rss / 1024 / 1024
    print(f"Memory used: {mem_mb:.2f} MB\\n")
6. Running the Classifier
Example 1:
input_images("image1.jpg")
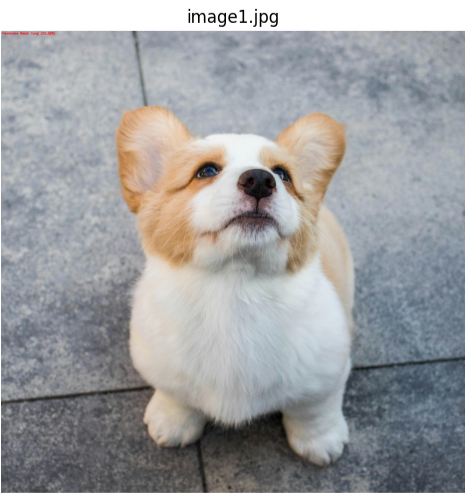
Predicted: Pembroke Welsh Corgi (55.38%)

Inference time: 69.69 ms

Memory used: 542.72 MB
Example 2:
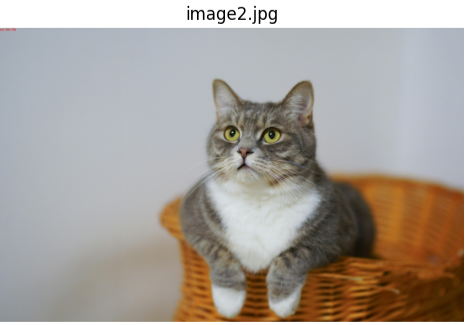
Predicted: lynx (66.17%)

Inference time: 28.89 ms

Memory used: 613.23 MB
Conclusion
In this blog, we explored the complete workflow of getting started with OpenCV on the Raspberry Pi, from hardware setup and Ubuntu installation to building OpenCV and running real-world vision applications. By working through image processing, video capture, contour analysis, object tracking, and deep learning based image classification, you now have a solid foundation for building your own computer vision projects. With the improved performance of the Raspberry Pi and the power of OpenCV, you can confidently move on to advanced applications such as robotics, surveillance, edge AI, and intelligent automation.
REFERNCES:


5K+ Learners
Join Free VLM Bootcamp3 Hours of Learning